ログインアカウントの確認とローカルアカウントへの変更方法(Windows10)/ How to Check the Login Account and Switch to a Local Account (Windows 10)
Here is the English translation of the instructions for changing from a "Media Center Account Name@hiroshima-u.ac.jp" to a local account when logging into a Windows 10 PC.
※These steps are based on "Windows 10 Education Version 1803 (April 2018 Update)" and may differ depending on the version.
- はじめに / Introduction
- ログインする時のアカウントの確認方法 / How to Check the Account Used for Login
- ローカルアカウントの作成方法 / How to Create a Local Account
- ローカルアカウントでログインする方法 / How to Login the Local Account
- 必要なファイルをローカルアカウントに移動またはコピーする方法
/How to Move or Copy Necessary Files to the Local Account - 「メディアセンターのアカウント名@hiroshima-u.ac.jp」でPCにログインしないようにする方法
/How to Prevent Logging in with "Media Center Account Name@hiroshima-u.ac.jp"
はじめに / Introduction
お使いのPCには、どのアカウントでログインしていますか?
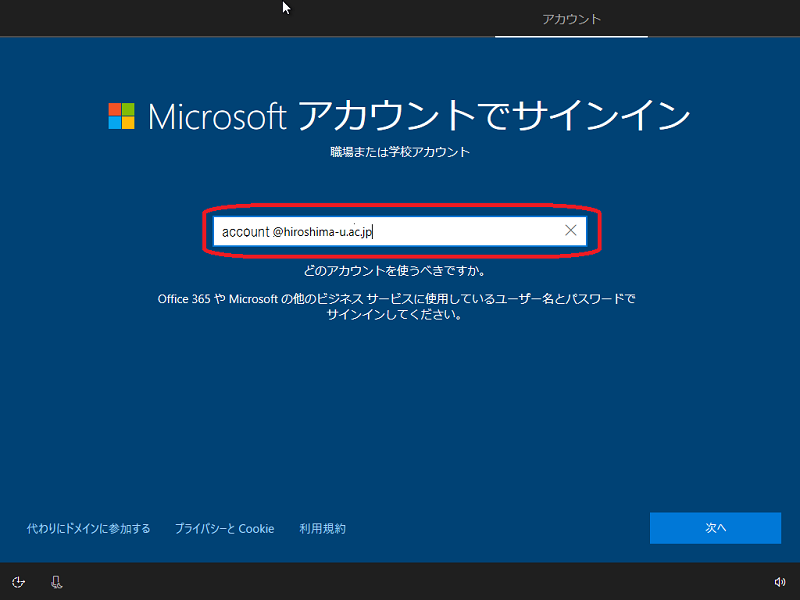
Windows10では、初期セットアップ時に「Microsoftアカウント」と「ローカルアカウント」を選ぶことができます。しかし、最初に表示されるのは以下の「Microsoftアカウント」なので、「Microsoftアカウント」でログインする方が多いかと思います。
「Microsoftアカウント」に、****@outlook.jp 等の個人のメールアドレスを設定し、ログインしている方はそのままで良いのですが、広島大学の「メディアセンターのアカウント名@hiroshima-u.ac.jp」を設定されている方は、「ローカルアカウント」でログインするように変更してください。
-----
What account are you using to log in to your PC?
In Windows 10, you can choose between a Microsoft account and a local account during the initial setup.
However, the default option displayed is the Microsoft account, so most users tend to log in with this account.
If you are using a Microsoft account with a personal email address such as ***@outlook.jp, there is no need to make changes.
However, if you are using Hiroshima University's "Media Center Account Name@hiroshima-u.ac.jp", it is recommended to switch to a local account.
- 広島大学から卒業や退職(離職)して、メディアセンターのアカウントが無効になった場合
- 年度更新や広大パスワードを変更しておらず、メディアセンターのアカウントにロックがかかった場合
This is because if you only have the "Media Center Account Name@hiroshima-u.ac.jp" registered as your login account, there is a possibility you may lose access to your PC.
For example:
・If you graduate or leave Hiroshima University and your Media Center account becomes deactivated.
・If you fail to update your account annually or change your Hiroshima University password, causing your Media Center account to become locked.
To prevent such issues, it is recommended to create a local account and use it for logging in.
※If your PC was set up during an introductory PC course at the university or a co-op, a local account may already have been created, and no further action is required.
ログインする時のアカウントの確認方法
/How to Check the Account Used for Login
まずは、自分がどのアカウントでログインしているのか確認しましょう。
First, let's check which account you are using to log in.
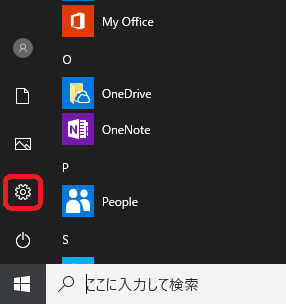
- スタート
 をクリックし、メニューから「設定」
 をクリックします。
Click Start and select Settings from the menu.
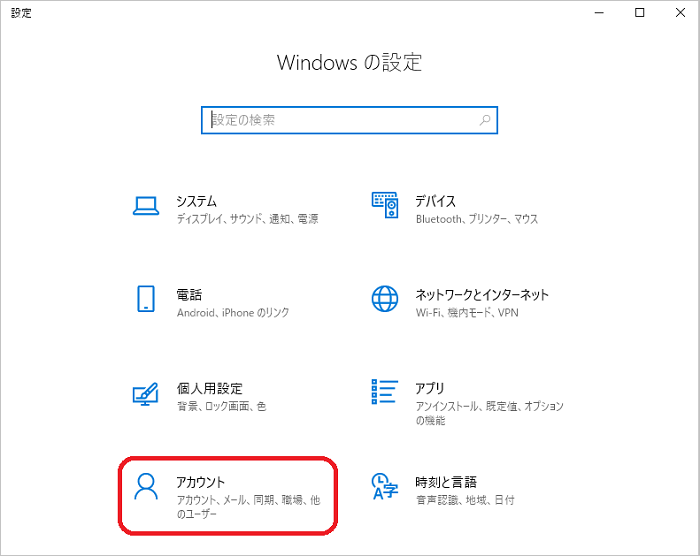
- Windows の設定画面が開きますので、「アカウント」をクリックします。
The Windows Settings screen will open. Click on Accounts.

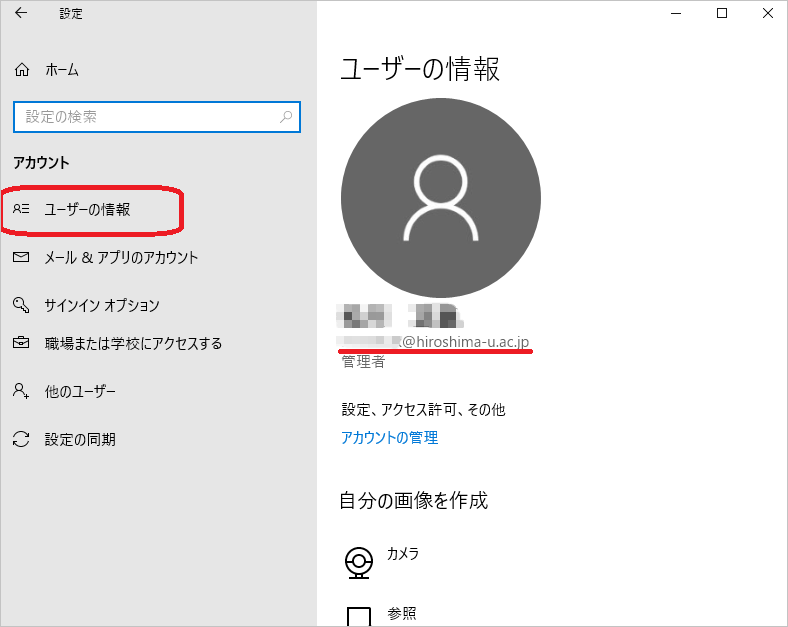
- 「アカウント」の左側のメニューの「ユーザの情報」をクリックします。
右側の「ユーザの情報」(以下画像の赤線の場所)に表示されているのが、ログインアカウントになります。
In the Accounts menu, click Your info on the left-hand side.
The account displayed under Your info (as indicated by the red line in the image) is the account you are currently using to log in.
- 「メディアセンターのアカウント名@hiroshima-u.ac.jp」の場合は、次の「ローカルアカウントの作成方法」へ
/If it shows "Media Center Account Name@hiroshima-u.ac.jp", proceed to the next section, How to Create a Local Account. - ***@outlook.jp等の個人のメールアドレスやローカルアカウントと表示されているアカウントの場合は、そのままご利用ください。
/If the account displayed is a personal email address such as ***@outlook.jp or a local account, you can continue using it as is.
- 「メディアセンターのアカウント名@hiroshima-u.ac.jp」の場合は、次の「ローカルアカウントの作成方法」へ
ローカルアカウントの作成方法 / How to Create a Local Account
----
A local account is an account that is not tied to any other network services and can be used exclusively on the PC where it is created.
If only the Media Center Account Name is displayed under Other users (e.g., CLOUD\Media Center Account Name as shown in the example below), you need to create a local account.
If other accounts are displayed (e.g., a personal email like ***@outlook.jp or an existing local account), you can use those accounts to log in instead.
In such cases, it is not necessary to create a new local account.
However, make sure that you can successfully log in using one of these accounts.
では、ローカルアカウントを作成してみましょう。
Now, let’s create a local account.
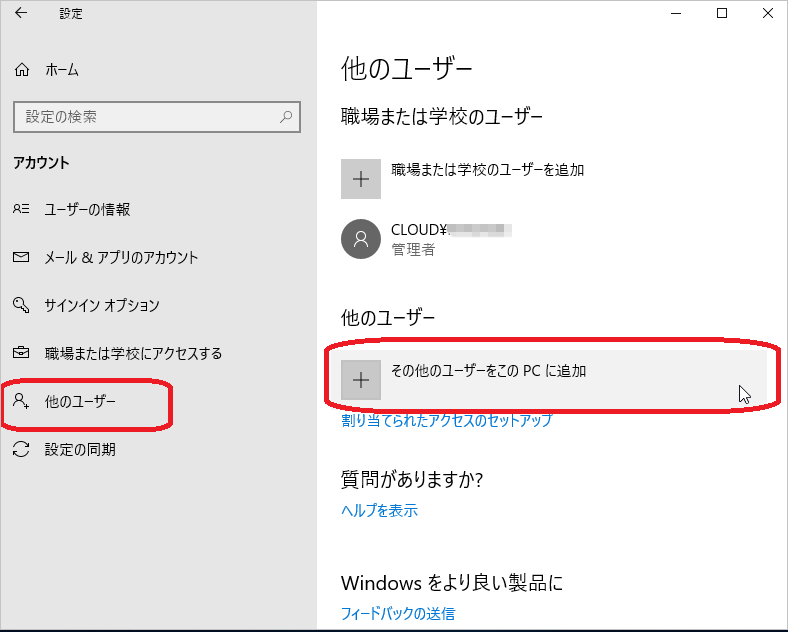
1.「アカウント」の左側のメニューの「他のユーザー」をクリックします。
右側に表示された「その他のユーザーをこのPCに追加」をクリックします。
In the Accounts menu, click Other users on the left-hand side.
On the right, click Add someone else to this PC.
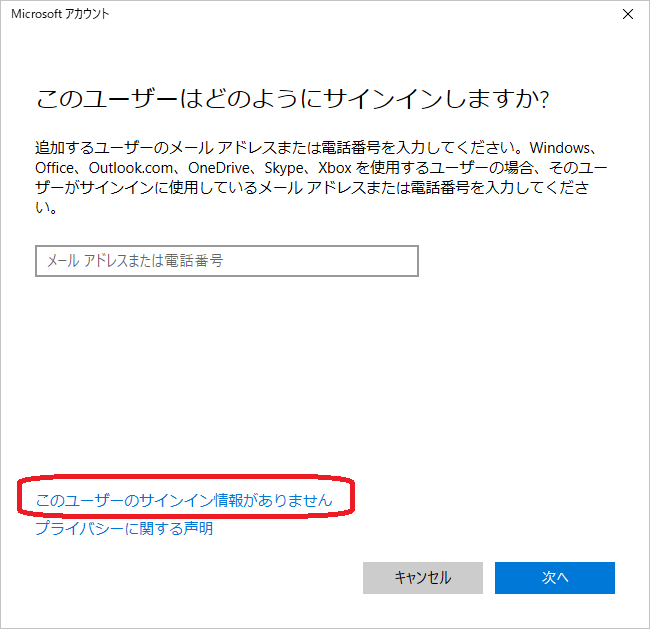
2.「このユーザーはどのようにサインインしますか?」の下部にある 「このユーザーのサインイン情報がありません」をクリックします。
Under How will this person sign in?, click I don’t have this person’s sign-in information at the bottom.
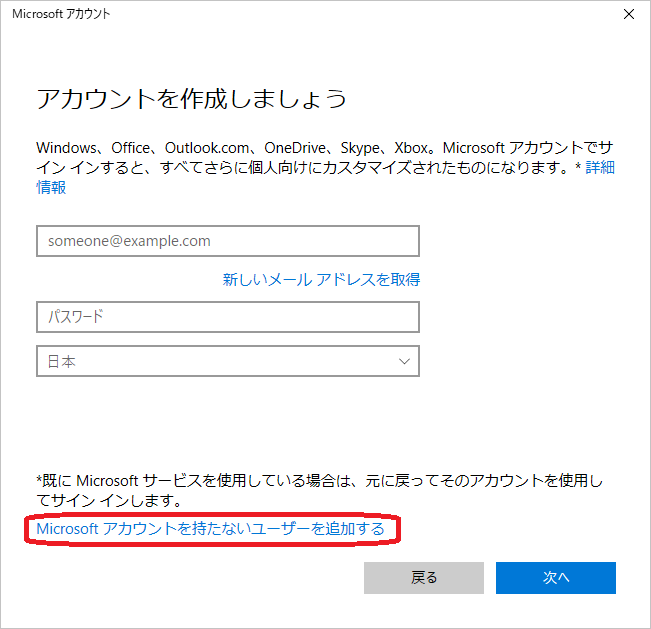
3. アカウントを作成しましょう」の下部にある 「Microsoftアカウントを持たないユーザーを追加する」をクリックします。
At the bottom of the Let’s create your account screen, click Add a user without a Microsoft account.
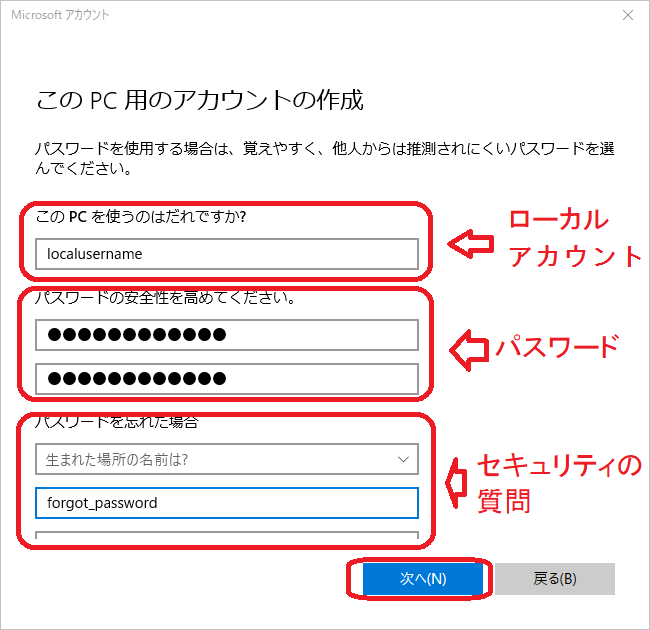
4. このPC用のアカウントの作成」で以下の設定をし、「次へ」をクリックします。
On the Create an account for this PC screen, complete the following settings and click Next
・このPCを使うのはだれですか?:ローカルアカウントになります。自分でわかりやすい、半角英数字で作成することをお勧めします。(ここでは“localusername”としています。)
Who’s going to use this PC?: This will be your local account.
It’s recommended to use a simple and easily recognizable username in alphanumeric characters (e.g., localusername).
・パスワード:ログインする時のパスワードになります。
Password: Set the password for logging in.
・パスワードを忘れた場合:この項目は、パスワードを入力すると表示されます。指示に従って設定してください。
Password hint: This option appears after entering a password.
Follow the instructions to set a hint to help you remember your password.
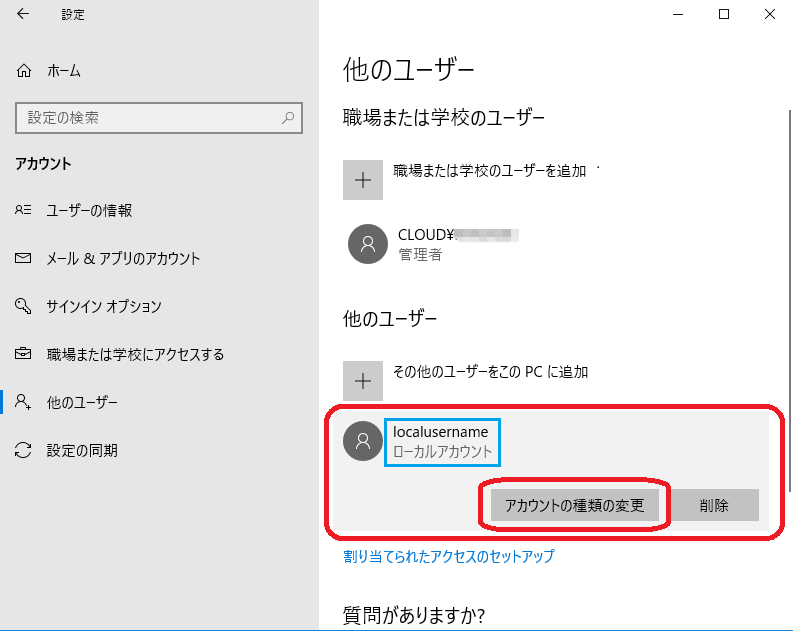
5.「他のユーザー」の画面に戻りますので、「ローカルアカウント」が作成されているのを確認してください。
そのローカルアカウントをクリックし 「アカウントの種類の変更」をクリックします。
Return to the Other users screen and confirm that the local account has been created.
Click on the local account, then select Change account type.

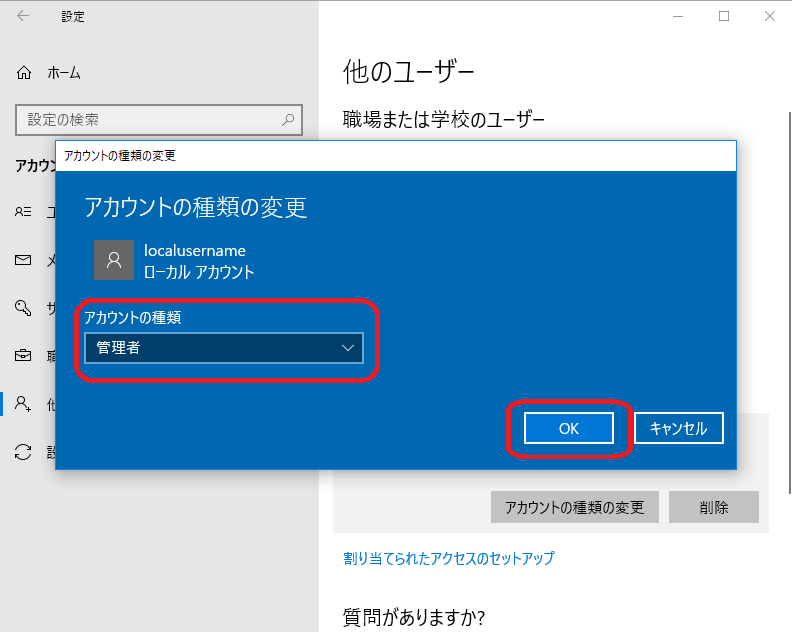
6.「アカウントの種類」を「管理者」に変更し「OK」をクリックします。
※データの以降等、今後スムーズに利用する為、ここで「管理者」に変更しておいてください。
Change the Account type to Administrator and click OK.
※Changing it to Administrator at this stage will ensure smoother usage, such as transferring data, in the future.
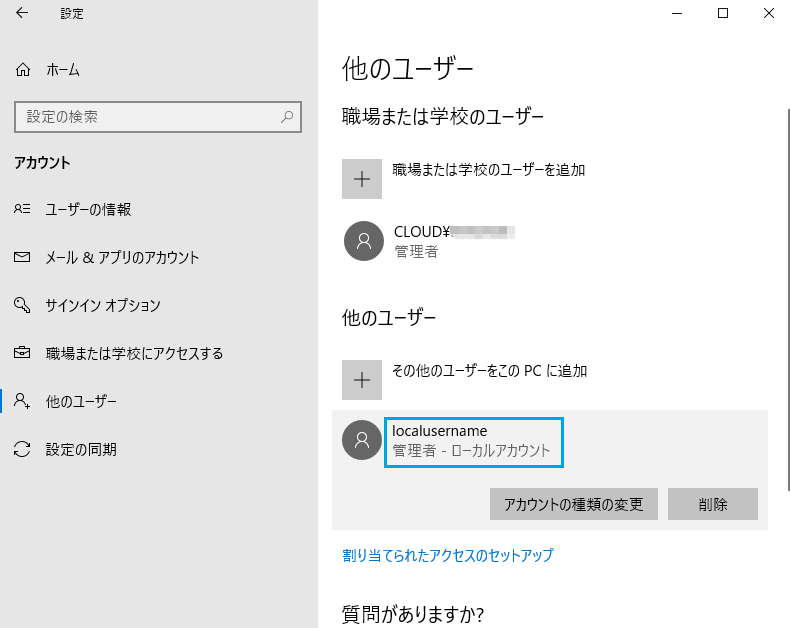
7.「ローカルアカウント」が「管理者-ローカルアカウント」に変更されていることを確認します。
Confirm that the Local Account has been changed to Administrator - Local Account.
以上でローカルアカウントの作成は終了です。
This completes the creation of the local account
では、作成したローカルアカウントでログインしてみましょう。
Now, let's log in using the newly created local account.
ローカルアカウントでログインする方法
/ How to Log in Using the Local Account
- Windowsのメニューから 「再起動」 または 「アカウントの切り替え」をクリックします。
From the Windows menu, click Restart or Switch account.
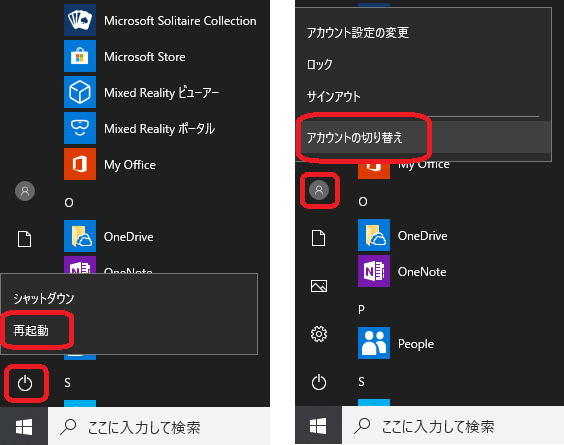
- ログイン画面が表示されたら「他のユーザー」をクリックし、「サインインオプション」をクリックします
When the login screen appears, click Other user, then select Sign-in options.
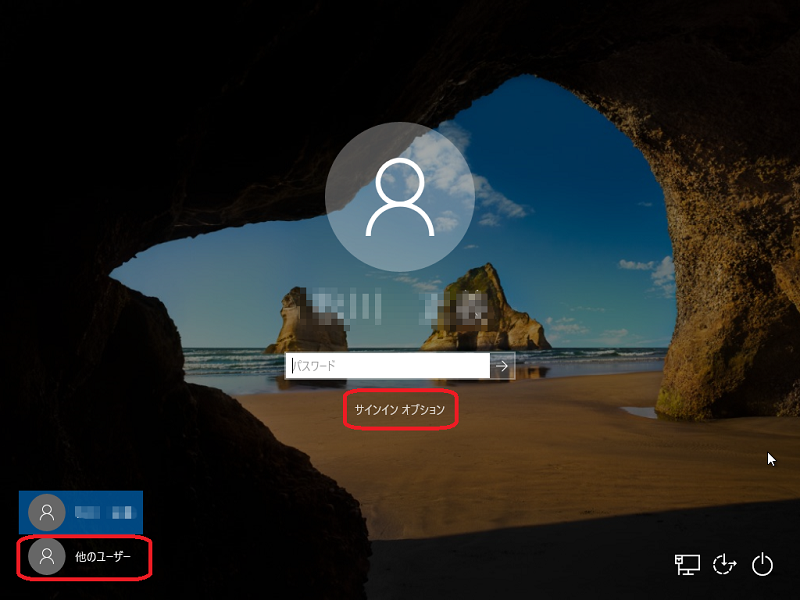
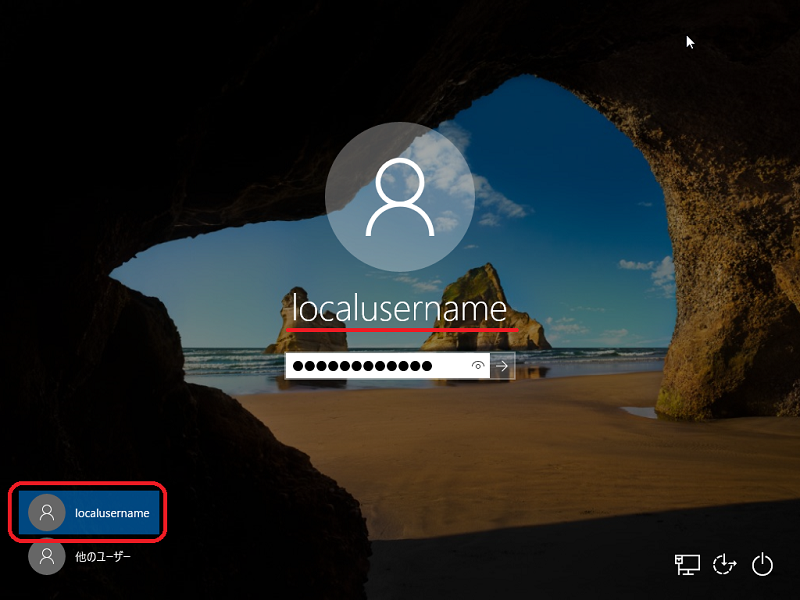
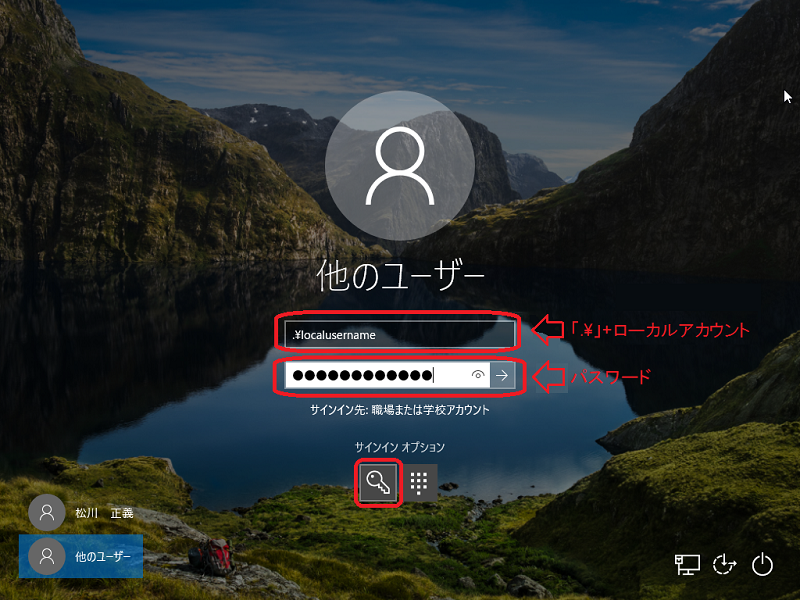
- 「サインインオプション」では「鍵マーク」(パスワード)を選択し、設定したローカルアカウントの先頭に 「.\」(ピリオドと円マーク)を付けて「.\ローカルアカウント」(ここでは、「.\localusername」)と ローカルアカウントのパスワードを入力し「Enterキー」を押します。
In Sign-in options, select the key icon (password).
Enter the local account name you set, preceded by .\ (a period and a backslash).
For example, enter .\localusername, followed by the password for the local account, and press Enter.
- ローカルアカウントの初期設定が始まります。しばらくするとデスクトップ画面が表示されます。
The initial setup for the local account will begin.
After a short while, the desktop screen will be displayed.
- デスクトップ画面が表示されますと、ログインは完了です。
Once the desktop screen appears, the login process is complete.
必要なファイルをローカルアカウントに移動またはコピーする方法
/How to Move or Copy Necessary Files to the Local Account
ローカルアカウントでログインすると、今まで「メディアセンターのアカウント名@hiroshima-u.ac.jp」でログインしてから作成・保存していたファイルが表示されません。以下の場所にファイルが保存されていますので、必要なファイルをローカルアカウントの領域に移動またはコピーしましょう。When logged in with the local account, files created or saved while using the "Media Center Account Name@hiroshima-u.ac.jp" will not be displayed.
These files are stored in the following location, so move or copy the necessary files to the local account’s area.
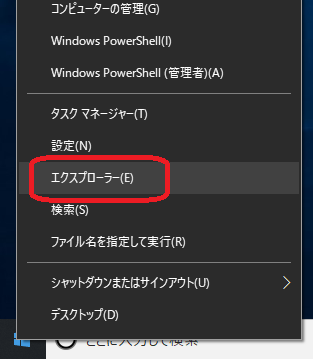
- スタート の上で右クリックし、メニューから「エクスプローラー」をクリックします。
Right-click on Start, and select File Explorer from the menu.
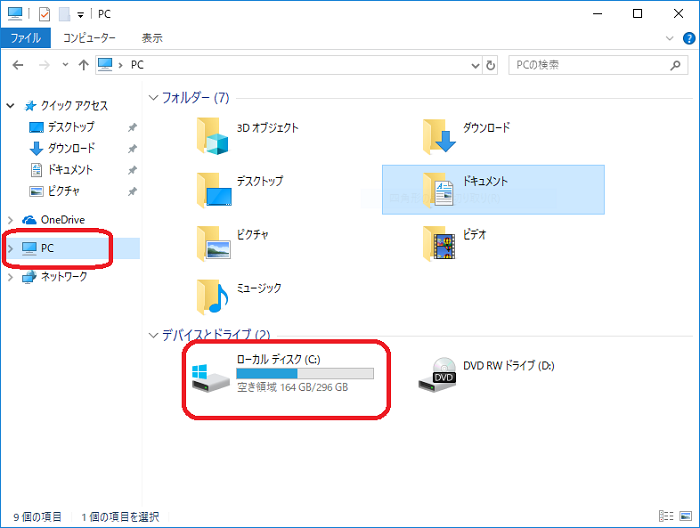
- 開いた画面の左側のメニューの「PC」をクリックし、右側の「デバイスとドライブ」の中の「ローカルディスク(C:)」をダブルクリックします。
※「ローカルディスク(C:)」はPCの設定によって名称が異なる場合があります。
In the window that opens, click This PC from the menu on the left.
On the right, under Devices and drives, double-click Local Disk (C:).
※The name Local Disk (C:) may vary depending on your PC settings.
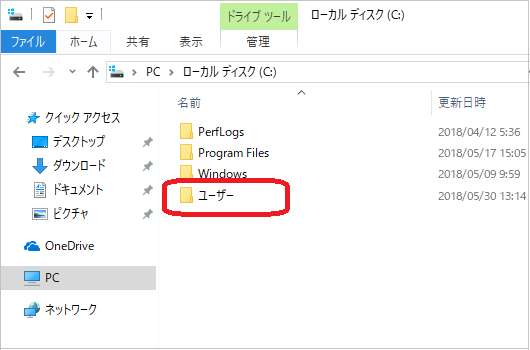
- 「ユーザー」ファルダをダブルクリックします。
Double-click the Users folder.
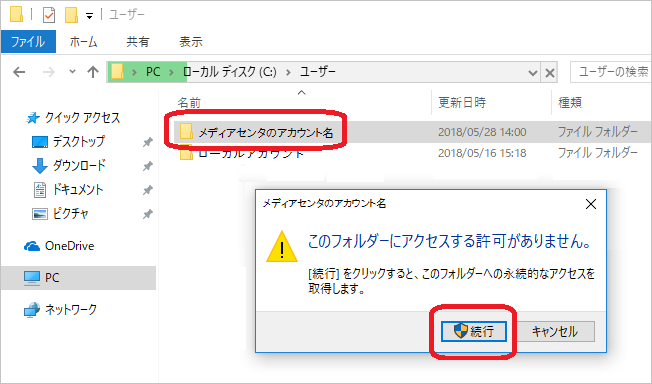
- ログインする時の、アカウント のフォルダが表示されます。
各アカウント のフォルダの中に、ファイルが保存されていますので、「メディアセンターのアカウント名」のフォルダをダブルクリックします。「このフォルダーにアクセスする許可がありません。」が表示されますので、「続行」をクリックします。
Double-click the Users folder.
Folders corresponding to the login accounts will be displayed.
Files are stored within each account's folder. Double-click the folder for the Media Center Account Name.
If a message saying "You don’t currently have permission to access this folder" appears, click Continue to proceed.
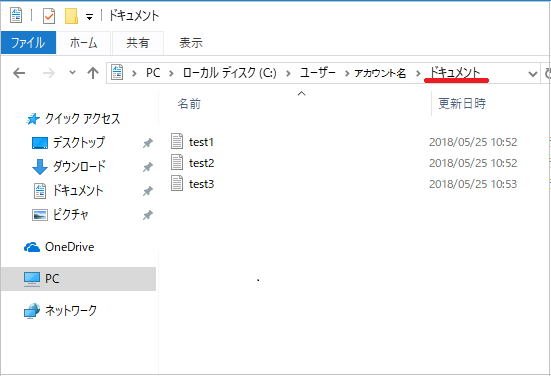
- メディアセンタのアカウント名の領域が開きますので、必要なファイルの保存先(ここでは、「ドキュメント」)を開き、作成したローカルアカウントの領域(デスクトップや自分で作成したフォルダ等)に移動またはコピー(ドラッグ・アンド・ドロップや右クリックしてコピー・貼り付け等)してください。
The folder for the Media Center account will open. Navigate to the location where the necessary files are saved (e.g., Documents).
Move or copy the files to the local account’s area (e.g., Desktop or a folder you created).
You can do this by using drag-and-drop or by right-clicking the files, selecting Copy, and then Paste in the desired location.
「メディアセンターのアカウント名@hiroshima-u.ac.jp」でPCにログインしないようにする方法
/How to Prevent Logging in with "Media Center Account Name@hiroshima-u.ac.jp
After creating a local account, you can follow the steps below to prevent logging in with the "Media Center Account Name@hiroshima-u.ac.jp".
- スタート から「設定」をクリックします。
Click Start and select Settings.

- Windows の設定画面が開きますので、「アカウント」をクリックします。
The Windows Settings screen will open. Click on Accounts.
- 左側のメニューから「職場または学校にアクセスする」をクリックします。
右側の「Hiroshima University の AzureAD に接続済み」をクリックし、「切断」をクリックします。
From the left-hand menu, click Access work or school.
On the right, select Connected to Hiroshima University AzureAD and click Disconnect.
- 以下の警告が表示されましたら、「はい」をクリックします。
If the following warning appears, click Yes.

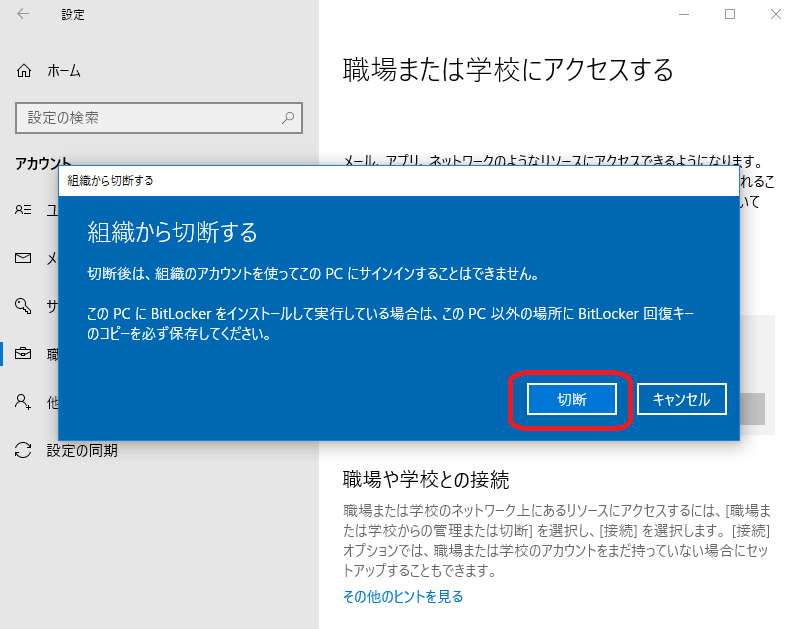
- 「組織から切断する」で「切断」をクリックします。
※切断しても、ファイル等は消えません。ファイルの保存先は、「必要なファイルをローカルアカウントに移動またはコピーする方法」をご参照ください。
On the Disconnect from organization screen, click Disconnect.
※Disconnecting will not delete your files. For file locations, refer to the section How to Move or Copy Necessary Files to the Local Account.
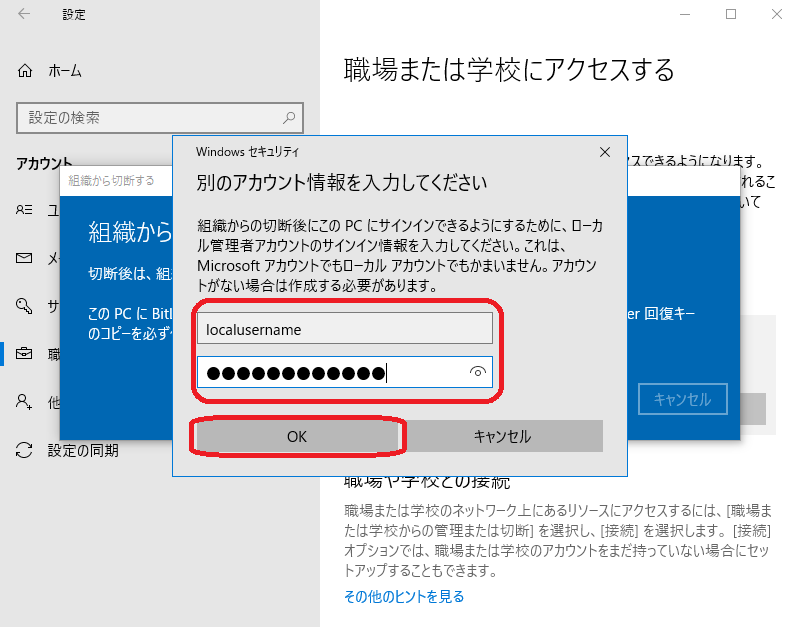
- 「別のアカウント情報を入力してください」で作成した「ローカルアカウント」と「パスワード」を入力し「OK」をクリックします。
In the Enter another account information prompt, input the username and password of the local account you created, then click OK.
- 「今すぐ再起動する」をクリックし、再起動してください。
Click Restart now to restart your PC.

- 再起動すると、ログインアカウントに、ローカルアカウントが表示されるようになります。
After restarting, the local account will appear as an option on the login screen.